Monday, December 3, 2012

Lil' gingerbread cookie clouds

This was a great recipe from http://www.culinaryconcoctionsbypeabody.com/ that I added a few changes to. If your in the mood for gingerbread and want a softer version of this Christmas classic then this is your kinda recipe...

Gingerbread Cookie Clouds


3 cups flour
2 tsp. Ginger, Ground
1 tsp. Cinnamon, Ground
1 tsp. baking soda
1/4 tsp. Nutmeg, Ground
1/4 tap salt
3/4 cup (1 1/2 sticks) unsalted butter, at room temperature
3/4 cup firmly packed brown sugar
1/2 cup molasses
1 egg
1/4 cup granulated sugar
1 tsp. Vanilla Extract
Mix flour, ginger, cinnamon, baking soda, nutmeg and salt in large bowl.Beat butter and brown sugar in large bowl with electric mixer on medium speed until light and fluffy. Add molasses, egg and vanilla; beat well. Gradually beat in flour mixture on low speed until well mixed. 
Wrap in plastic wrap. Refrigerate 4 hours or overnight, Or if your in a hurry like me you can place dough in freezer for about 45min. long enough for the butter to harden. Preheat oven to 350°F. Shape dough into 2-inch balls. Roll in granulated sugar. Place 2 inches apart on ungreased baking sheets.
Bake 10 to 15 minutes or until edges of cookies just begin to brown. Remove to wire racks; cool completely. Store cookies in airtight container up to 5 days.

Monday, November 26, 2012

DIY Felt Christmas Light Garland

I was inspired to make these via: http://hrrrthrrr.com/ she had a great tutorial about the how to.

Ingredients:
+Felt squares
+Scissors
+Ribbon
+Marker
+And you could either sew these by hand or through your sewing machine, which is what I did.

Start off by making a template for yourself of the light and also of the connector piece to copy onto the felt squares with your marker. Cut out all pieces and line up two pieces of the light felt and one strip of the connector piece folded over and simply get to sewing. If you wish you could stuff these to make them appear even fuller but I found that it wasn't necessary and took a lot more extra time. 

I also sewed the outer edge of the connector piece to show stitching, again not necessary but I think it makes them stand out a bit more. Lastly string your ribbon through a needle (a large needle) and thread it through the connector piece of the lights so that they don't all bunch towards the center. 
And Voila!

Like hrrrthrrr  says its a bit time consuming but worth it in the end and would make a great family project with the kiddos. 
  

Wednesday, September 12, 2012

Homemade Cinnabunz

So yummy, and the recipe can be found here:


Like all good things they take some time but are well worth it.

Enjoy!
Pre-bake
 The grand finale!!!
The center is always the best part...

Tuesday, September 11, 2012

We Converted a 1960's TV into a Mini Bar...

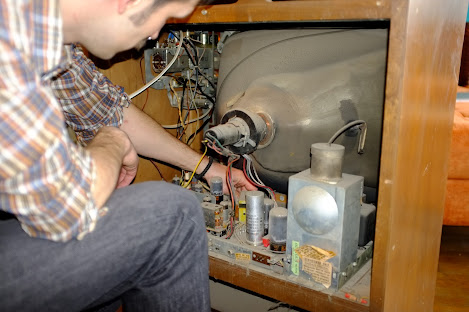
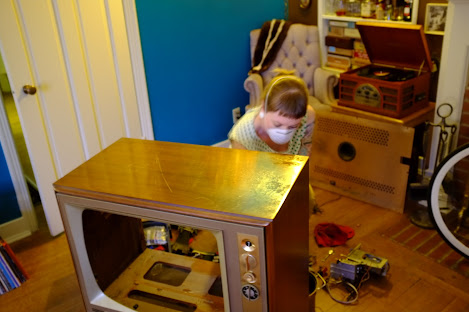
So my husband and I purchased this vintage 1960's TV in the hopes of converting it into a mini bar. Inspired through the lovely land of Pinterest, we set out to make it happen. The husband went to work gutting it out and I took care of the cleaning, and it was DUSTY, layers upon layers of dust! Over all the process was fairly easy, just a lot of dirty work. Once clean we lined it with a nice fabric, and strung Christmas lights on the top part of the inside of the TV. Finally we added the goods and couldn't be happier with it!!!

Inside the beast.
Dust is my kryptonite!
A celebratory drink is definitely in order.
Isn't she beautiful?!?!